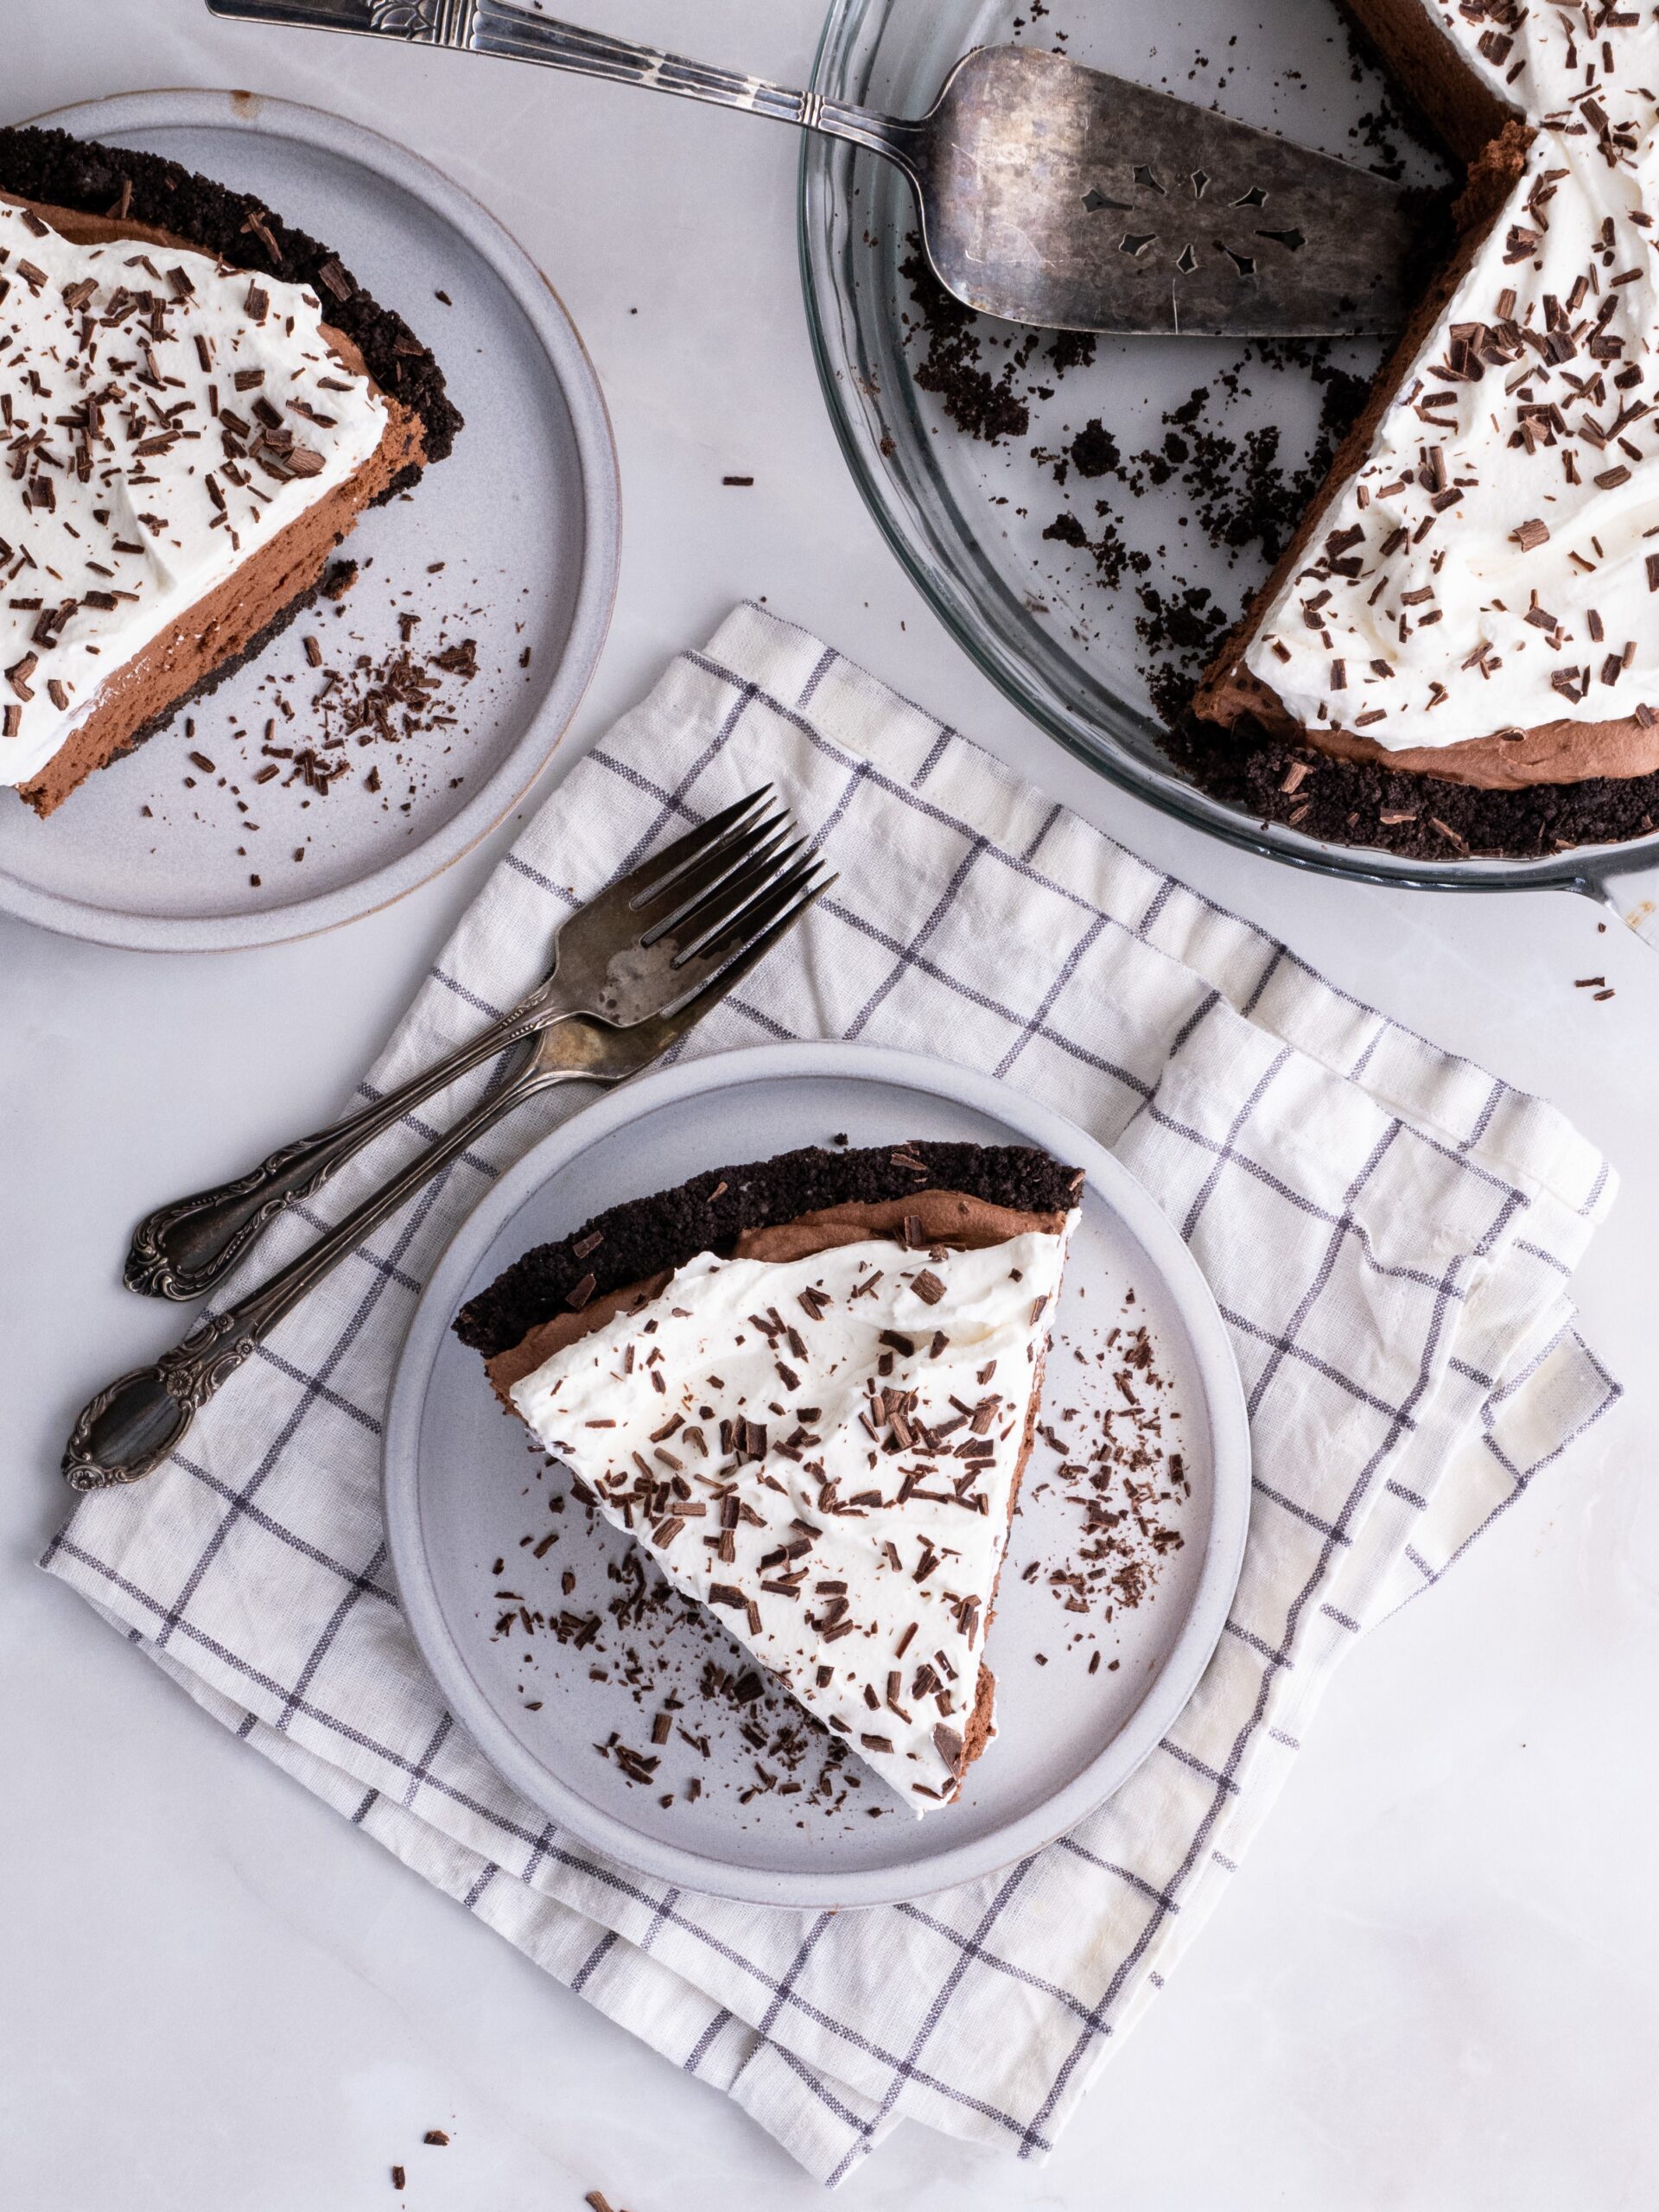
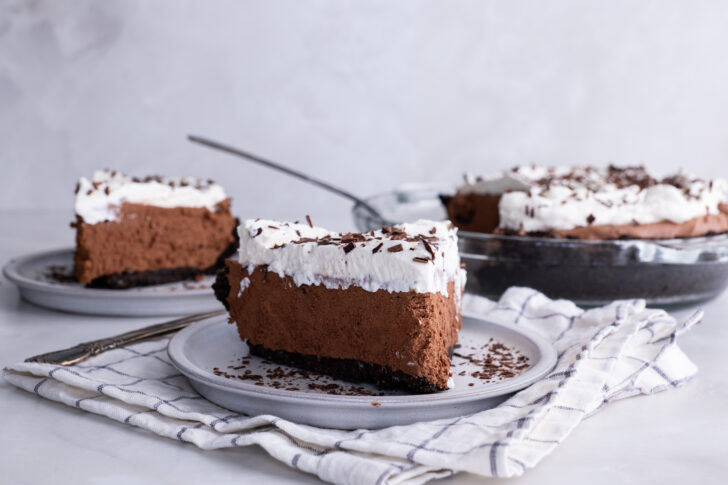
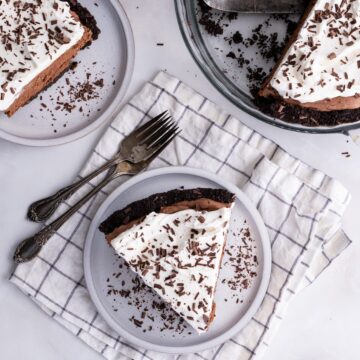
Ultra-Decadent Chocolate Mousse Pie
A crisp Oreo cookie crust. A silky, cloud-like chocolate mousse filling. A billowy whipped cream topping. A deep, rich chocolate flavor that makes everyone go quiet after the first bite. Nothing makes me more poetic than a decadent chocolate dessert!
The best part about this chocolate mousse pie can be made a day ahead.
Looking for a different kind of pie? Banana Pudding Pie is one of my personal favorites. You can also try these equally delicious desserts: S’mores Bites, or 3-Ingredient Oreo Fudge.
Watch The How-To Video
Why You’ll Love This Chocolate Mousse Pie
1. It’s intensely chocolatey without being too heavy.
The combination of semi-sweet chocolate chips and bittersweet chocolate creates a balanced flavor. It’s rich, but not cloyingly sweet.
2. The espresso powder makes a difference.
It does not make the pie taste like coffee. Instead, it deepens the chocolate flavor and gives it that bakery-level richness. If you have espresso powder, do not skip it.
3. The texture is dreamy.
Thanks to whipped cream folded into the cooled chocolate mixture, the filling is light and airy while still being decadent.
4. It’s make-ahead friendly.
This pie needs time to chill and set, which makes it perfect for entertaining. Make it the day before and cross dessert off your list.
5. The Oreo crust is simple and foolproof.
No complicated pastry dough. No blind baking with weights. Just crushed cookies and butter pressed into a pan.
How to Make Chocolate Mousse Pie
Here is a full breakdown of the process so you understand what is happening at each step.
Step 1: Prepare the Oreo Crust
Preheat your oven to 350°F.
Add the Oreo cookies to a food processor and pulse until you have fine crumbs. Drizzle in the melted butter and pulse again until the mixture resembles wet sand.
Press the crumbs firmly into the bottom and up the sides of a 9-inch pie plate. Use the bottom of a measuring cup to pack it tightly. This helps prevent a crumbly crust later.
Bake for 8 to 10 minutes, then let it cool completely.
Why bake the crust?
Baking helps set the butter and creates a sturdier base that holds up to the mousse filling.
Step 2: Melt the Chocolate Filling
In a medium saucepan over low heat, combine:
- Chocolate chips
- Chopped bittersweet chocolate
- Butter
- Mini marshmallows
- Whole milk
- Espresso powder
- Pinch of salt
Cook gently, stirring constantly, until everything is melted and smooth. The marshmallows take a few minutes to fully melt, so be patient and keep stirring.
Once smooth, remove from heat and stir in the vanilla extract. Let the mixture cool to room temperature. This usually takes about 15 to 20 minutes.
Why cool it?
If the chocolate mixture is too warm, it will deflate the whipped cream in the next step.
Step 3: Whip and Fold
In a large bowl, whip the heavy cream to stiff peaks.
Fold about one third of the whipped cream into the cooled chocolate mixture. This lightens it and makes it easier to combine.
Then gently fold in the remaining whipped cream until no streaks remain.
Be gentle. Overmixing will deflate the mousse and make it dense instead of airy.
Step 4: Fill and Chill
Spoon the mousse into the cooled crust and smooth the top.
Refrigerate for at least 3 hours or overnight until fully set.
This chilling time is essential. It allows the mousse to firm up and slice cleanly.
Step 5: Make the Topping
Just before serving, whip the heavy cream, sugar, and vanilla extract to medium peaks.
Spread or pipe it over the pie. Add chocolate shavings if desired.
Pro Tips for the Best Chocolate Mousse Pie
Use Good Quality Chocolate
Since chocolate is the star, quality matters. A brand like Ghirardelli works beautifully. Better chocolate equals better flavor.
Do Not Skip the Espresso Powder
It enhances the chocolate without making it taste like coffee. If you have it, use it.
Let the Chocolate Cool Before Folding
Warm chocolate will collapse your whipped cream and ruin the mousse texture.
Chill Long Enough
Three hours is the minimum. Overnight is even better if you have time.
For Clean Slices
Dip a knife in hot water and wipe it dry between cuts. This gives you beautiful, bakery-style slices.
Make Ahead and Storage
One of the biggest advantages of this chocolate mousse pie is that it is perfect for making ahead.
Make Ahead:
You can prepare the pie up to 1 day in advance. Store it covered in the refrigerator.
Add the whipped cream topping just before serving for the freshest look.
Storage:
Store leftovers covered in the refrigerator for up to 3 days.
Keep in mind that the crust may soften slightly over time, but the flavor remains delicious.
Variations to Try
Once you master the base chocolate mousse pie, you can easily customize it.
Dark Chocolate Mousse Pie
Use all bittersweet chocolate for a deeper, less sweet flavor.
Peanut Butter Chocolate Mousse Pie
Swirl a layer of peanut butter into the crust before adding the mousse.
Mint Chocolate Mousse Pie
Add a small amount of peppermint extract to the filling for a holiday twist.
Raspberry Chocolate Mousse Pie
Add a thin layer of raspberry preserves between the crust and mousse.
Frequently Asked Questions
Can I Make Chocolate Mousse Pie Without Baking the Crust?
You can skip baking if you prefer, but baking helps the crust hold together better. For best results, bake it.
Can I Freeze Chocolate Mousse Pie?
Yes. Freeze without the whipped topping. Wrap tightly and freeze for up to 1 month. Thaw in the refrigerator before serving.
Why Is My Mousse Too Dense?
This usually happens if the whipped cream was overmixed or folded too aggressively. Be gentle when folding.
Can I Use Milk Chocolate?
You can, but the pie will be much sweeter. Semi-sweet and bittersweet provide better balance.
Serving Suggestions
This chocolate mousse pie is rich, so smaller slices are usually perfect.
Serve it with:
- Fresh berries
- A drizzle of chocolate sauce
- A sprinkle of flaky sea salt
- A scoop of vanilla ice cream
It pairs beautifully with coffee, espresso, or even a glass of red wine.
Love this Chocolate Mousse Pie recipe? Please leave a 5 star ⭐️⭐️⭐️⭐️⭐️ rating in the recipe card below ⬇️ and/or a review in the comment section further down.
Hungry for more? Follow Suburban Simplicity on Facebook, Instagram, YouTube, and Pinterest to see more DIYs, recipes, and home tips!
Also, don’t forget to sign up for email!
I only send one email a week, and it’ll include my latest recipes, DIYs, and tips, information about exclusive “email only” giveaways, and more! See form below!
Want to subscribe to the Suburban Simplicity Recipe Club? It’s only $5 per month, and you’ll get ad-free PDFs of any new recipes that I post while supporting me at the same time! Join the club, here.
Chocolate Mousse Pie
Ingredients
Crust
- 25 Oreo cookies, regular, not doublestuff
- 5 tablespoons melted unsalted butter
Filling
- 1 cup semi-sweet chocolate chips
- 4 ounce bittersweet chocolate bar, like Ghirardelli or another ½ cup semi sweet chocolate
- 2 tablespoons salted butter
- 1 ½ cups mini marshmallows
- ⅓ cup whole milk
- 1 teaspoon espresso powder
- Pinch of salt
- 1 ¾ cups heavy whipping cream
Topping
- 1 cup heavy whipping cream
- 2 tablespoons granulated sugar
- ½ teaspoon pure vanilla extract
- Chocolate shavings as garnish, optional
Instructions
- Prep: Preheat oven to 350°F. (177°C)
- Make the Crust: Add Oreo cookies to a food processor and pulse into fine crumbs. Drizzle in melted butter and pulse until the mixture resembles wet sand. Press firmly into the bottom and up the sides of a 9-inch pie plate. Bake for 8-10 minutes and cool completely before using. PRO TIP: Use a small measuring cup to push the crumbs tightly into the baking dish.
- Prepare the Chocolate Filling: In a medium saucepan over low heat, combine chocolate chips, chopped chocolate, butter, marshmallows, milk, espresso powder, and salt. Cook gently, stirring constantly, until smooth and fully melted. The marshmallows take a few minutes, but just keep stirring. Remove from heat, add pure vanilla extract, and let cool to room temperature (about 15–20 minutes).
- Whip & Fold: In a large bowl, whip the heavy cream to stiff peaks. Gently fold about ⅓ of the whipped cream into the cooled chocolate mixture to lighten it. Fold in the remaining whipped cream just until no streaks remain.
- Fill & Chill: Spoon the mousse into the baked and cooled crust and smooth the top. Refrigerate for at least 3 hours, or overnight, until set.
- Make the Topping: Just before serving, whip the heavy cream, granulated sugar, and vanilla to medium peaks. Spread or pipe over the pie. Garnish with chocolate shavings if desired. Enjoy!
Notes
- The espresso powder deepens the chocolate flavor but doesn’t make the pie taste like coffee. My advice, don’t skip it if you have it!
- PRO TIP: For clean slices, dip a knife in hot water and wipe dry between cuts.
- Make Ahead: This pie can be made 1 day ahead, making it perfect for entertaining.
- Store leftovers covered in the refrigerator for up to 3 days.