Adorable DIY Unicorn Pumpkin
Easy step-by-step tutorial for how to make a no-carve Unicorn Pumpkin. This DIY idea is so adorable you’ll want to keep it up year-round!
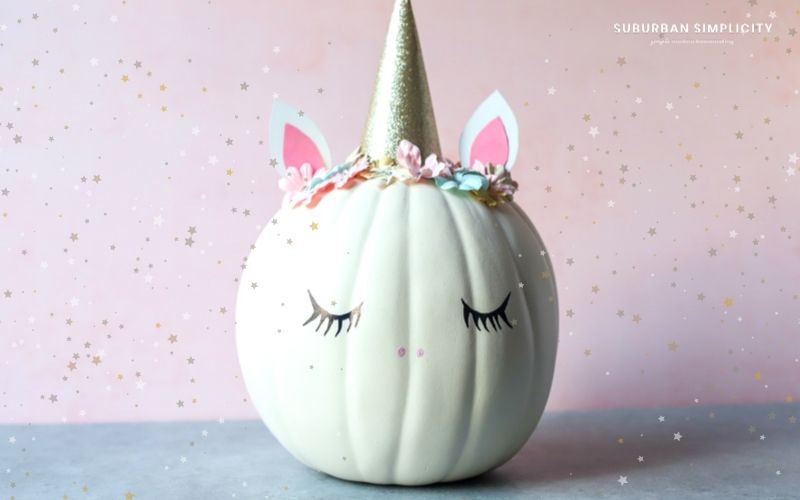
It’s fall, and that means pumpkins! What little prince or princess wouldn’t love to create a DIY Unicorn Pumpkin? This adorable masterpiece is simple and inexpensive to put together. Plus, it’s perfect for decorating the front porch or for adorning your playroom!
No need to get out the carving knife and create a mess all over the kitchen. This DIY is kid-friendly and so darn cute!
Related: Kid-Friendly Halloween Treats
Supplies Needed to Make a Unicorn Pumpkin
- Faux White Pumpkin
- Gold Glitter Paper
- Glue Gun
- Pink Paper
- White Paper
- Black Sharpie
- Pencil
- Pink Marker or Paint
- Paper Flowers (in your choice of colors)
- Scissors
Most of these supplies can be sourced from Amazon or Michaels.
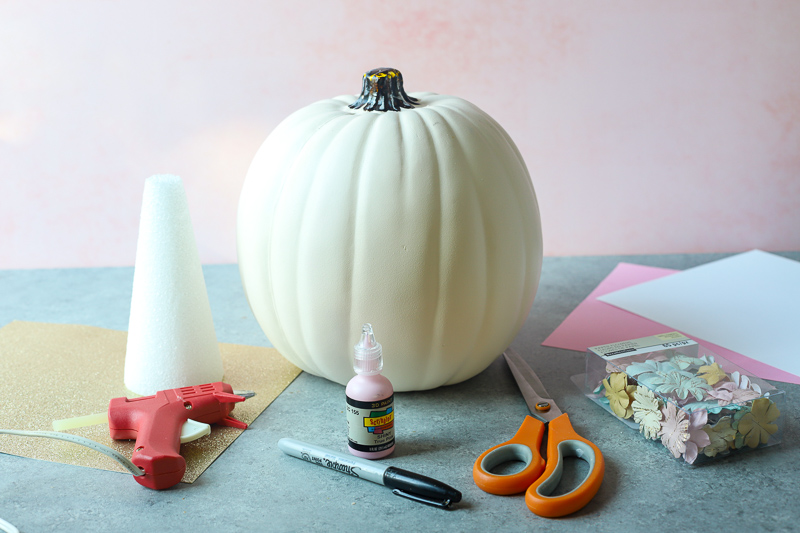
Tip: Because of the use of the hot glue gun, kids will need to be supervised in the making of this project.
How to Make a Unicorn Pumpkin
With a few craft supplies and these how-to instructions, you can create your own DIY Unicorn Pumpkin for kids. It’s so cute. You might want to keep it up year-round!
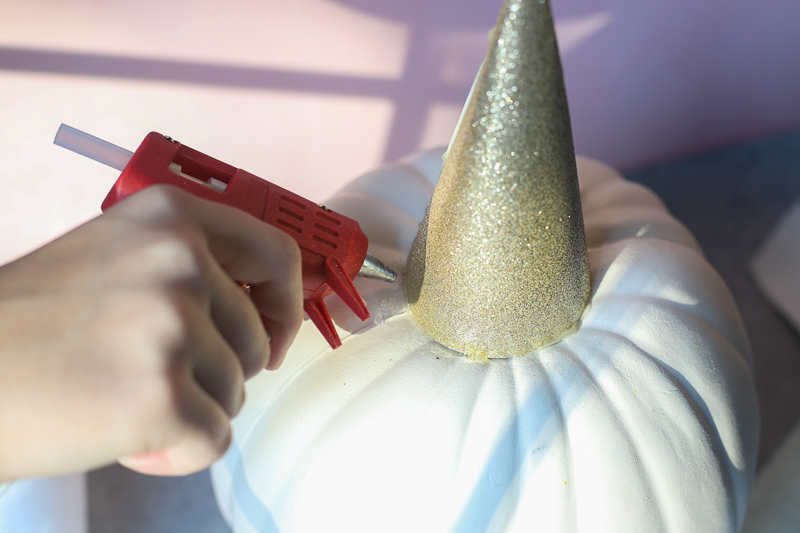
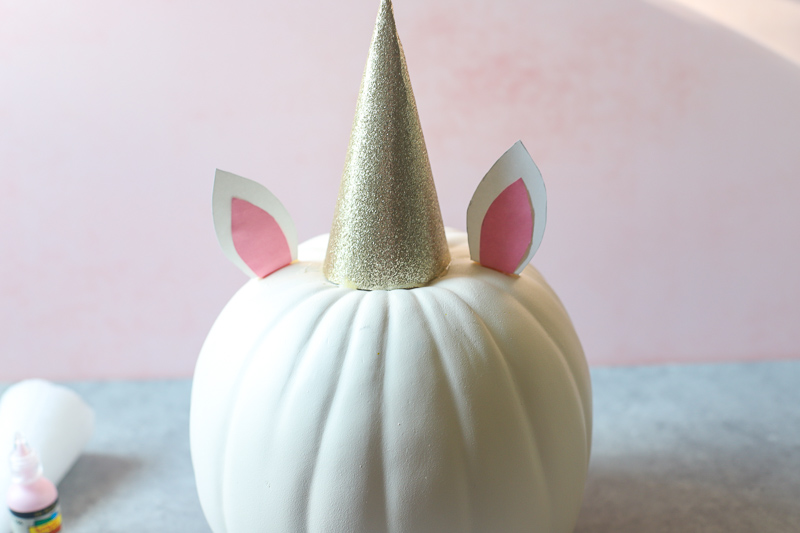
Step 1 – Make Your Horn
Take a piece of gold glitter paper and cut an arch at one corner. Glue the edges together to form a cone for the horn. Glue this onto the top of the pumpkin. Our’s fit right over the stem.
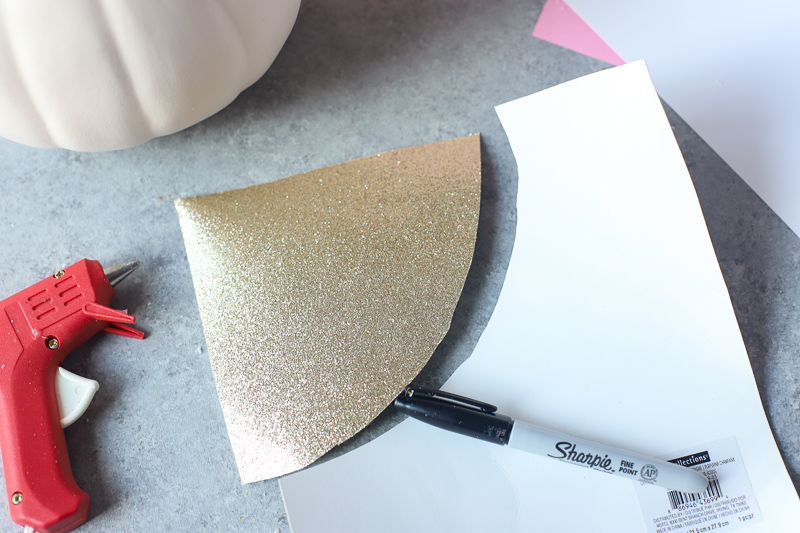
As an alternative, you can use a styrofoam cone to create your horn. Just cover it with the glitter paper.
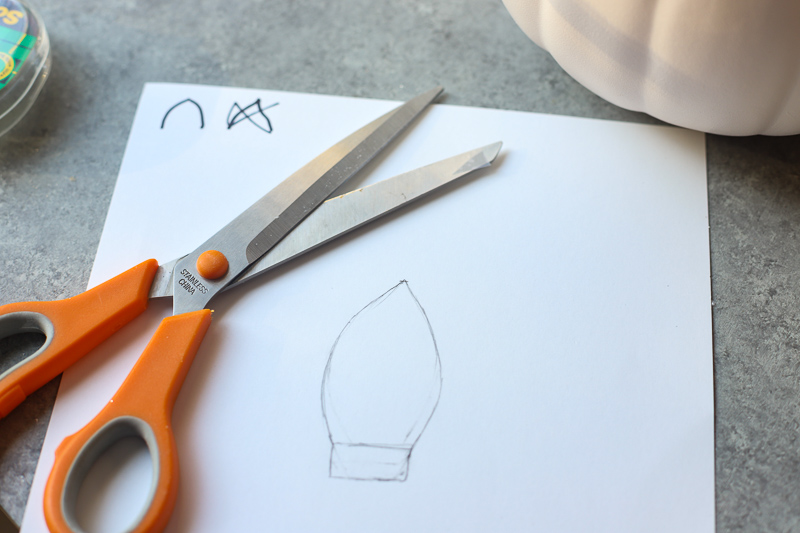
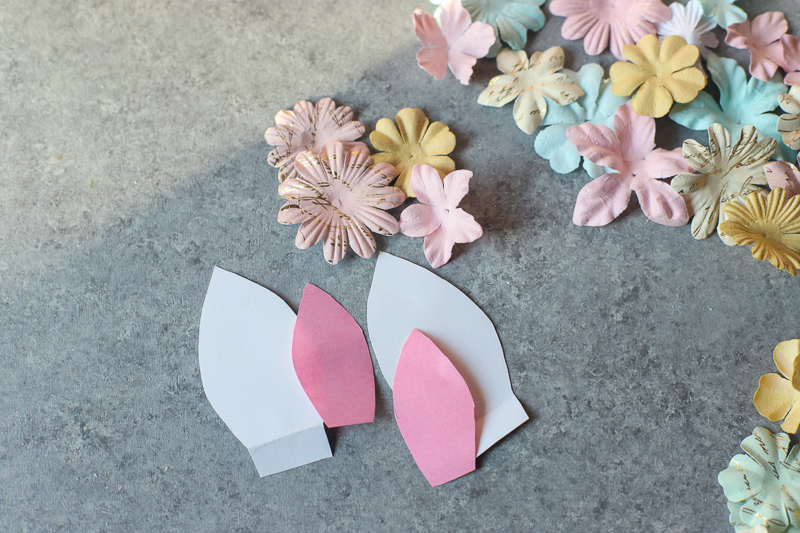
Step 2 – Create Your Ears
Take your white paper and pencil and draw an ear—make sure there is a little space at the bottom to fold over and attach to the pumpkin. Cut it out. Use that ear to trace the second ear so the ears match and cut it out.
Take one of your white ears and trace it on the pink paper folded in half to create the pink inner ear. Cut it out slightly smaller than the larger white ear. Attach with hot glue.
Step 3 – Glue On Your Flowers
Next, start gluing your flowers around the horn and ears at the top of the pumpkin. When it feels full and to your liking, it’s probably enough for the flower crown.
Tip: Use a few different colors and sizes of flowers to give the crown some dimension.

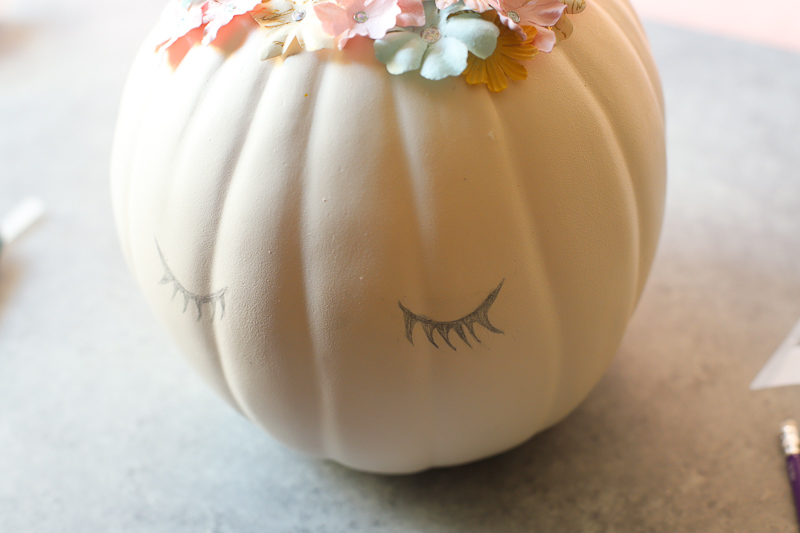
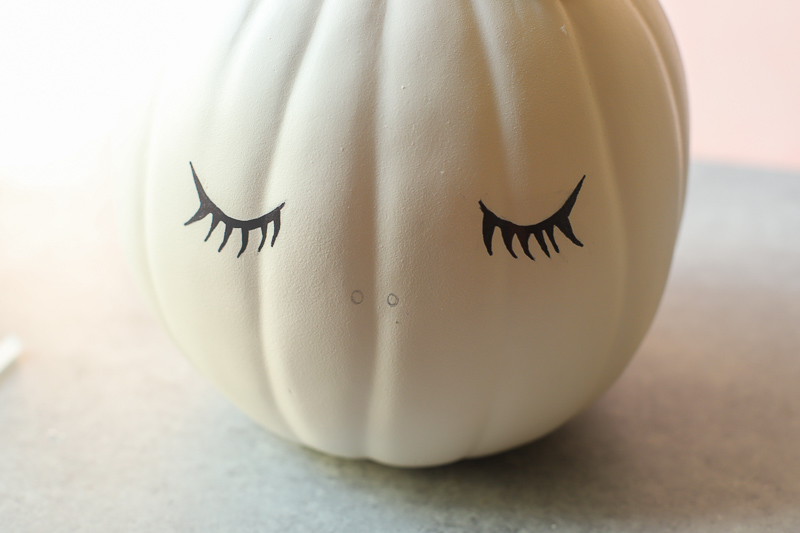
Step 3 – Add the Face
We find it most helpful to take your pencil and draw your eyelashes on your pumpkin. Once they look the way you’d like them to, trace them with a black Sharpie. For the nose, place two pink dots in the center of the face, slightly lower than the eyes, with either a pink pen or pink paint.
FOLLOW US FACEBOOK, TWITTER, INSTAGRAM, and PINTEREST to see more delicious food, fun crafts + DIYs!
Read Next: Easy and Adorable Bat Bites