How To Make a Lemon Tart From Scratch
This lemon tart is everything I want this summer: a crisp, buttery crust that practically melts in your mouth, a filling that’s tangy and rich without tipping into “pucker your face” territory, and twirls of soft whipped cream on top that aren’t just there for aesthetics. I know baking something from scratch can sound intimidating if you’re not an avid baker, but I promise this recipe walks you through every step; including what to do if you don’t own pie weights.
Jump straight to the printable recipe card at the bottom of this post if you just want the measurements and steps! As always, I appreciate your support of Suburban Simplicity!
Want more lemon desserts? I’ve rounded up 30 incredible lemon centered recipes that you’ll fall in love with!

Why You’ll Love This Lemon Tart
- The crust is a real pâte sucrée, which is just a fancy French way of saying “sweet, cookie-like crust.” It’s sturdier than a flaky pie crust, so it holds its shape and gives you that satisfying snap when you cut into it.
- The filling is silky, not gummy. Straining it and baking it low and slow gives you a smooth, custard-like texture instead of the dense, almost-too-sweet filling you find in a lot of lemon bars.
- It’s make-ahead friendly. The crust, and even the entire baked tart, can be made a day or two before you need it.
- It tastes like a “fancy” bakery dessert but uses ingredients you probably already have, aside from fresh lemons.

What Does Lemon Tart Taste Like?
Think somewhere between lemon curd and a creamy custard pie. It’s bright and tangy from the fresh lemon juice and zest, balanced by sugar and a touch of cream so it never tastes sour or one-note. Compared to lemon bars, this tart has a much smoother, silkier filling and a crisper, more substantial crust. Compared to lemon meringue pie, you get whipped cream instead of meringue, which I personally find a lot more foolproof (no weeping meringue to worry about here!).
How to Make Lemon Tart, Step by Step
Step 1: Make the Pâte Sucrée Dough
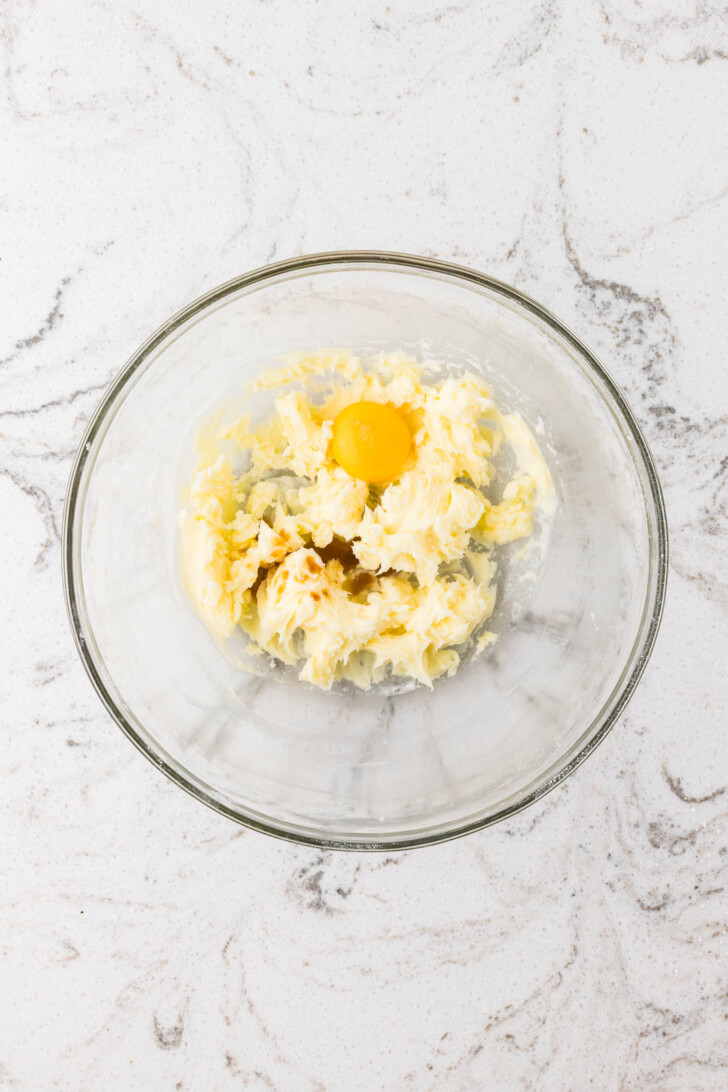
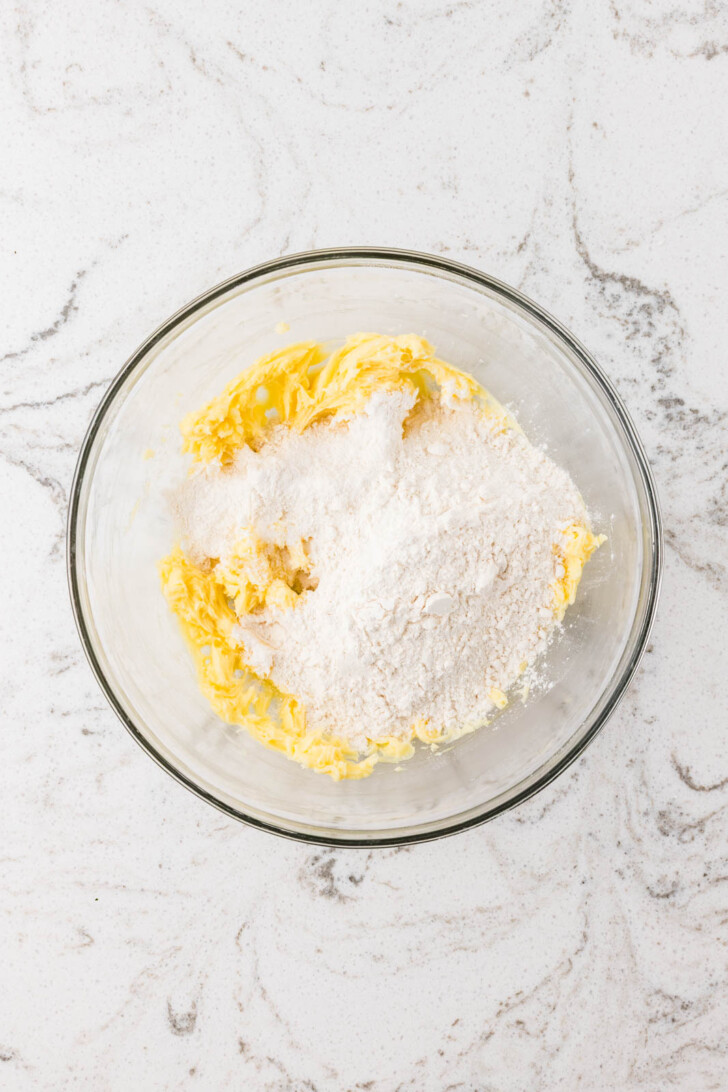

Beat the softened butter and powdered sugar together until smooth and creamy, about 2-3 minutes total. Mix in the egg yolk and vanilla until combined, then add the flour and salt and mix just until the dough looks crumbly. Add the cold cream, a tablespoon at a time, mixing only until the dough comes together. The dough should feel soft and smooth, not sticky. If it’s too dry to hold together when you press it, that’s when you reach for that second tablespoon of cream.
Step 2: Chill, Then Roll
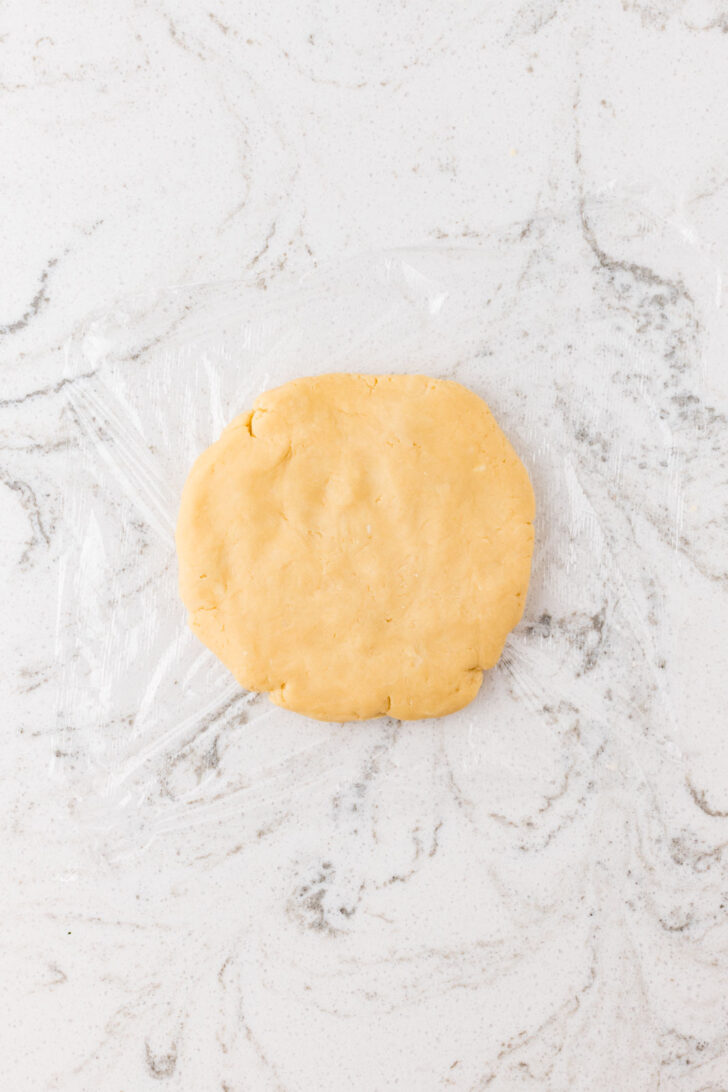

Shape the dough into a disk, wrap it tightly in plastic, and refrigerate for an hour, until firm but still rollable. When you’re ready, roll it out on a lightly floured surface into a 12-inch circle, about ⅛-inch thick, then transfer it to your 10-inch tart pan. Press it gently into the bottom and up the sides without stretching the dough, then roll your rolling pin across the top of the pan to trim off the excess.
Pro tip: Lightly flour your work surface instead of adding extra flour directly into the dough. The more flour you work into it, the tougher your crust will be.
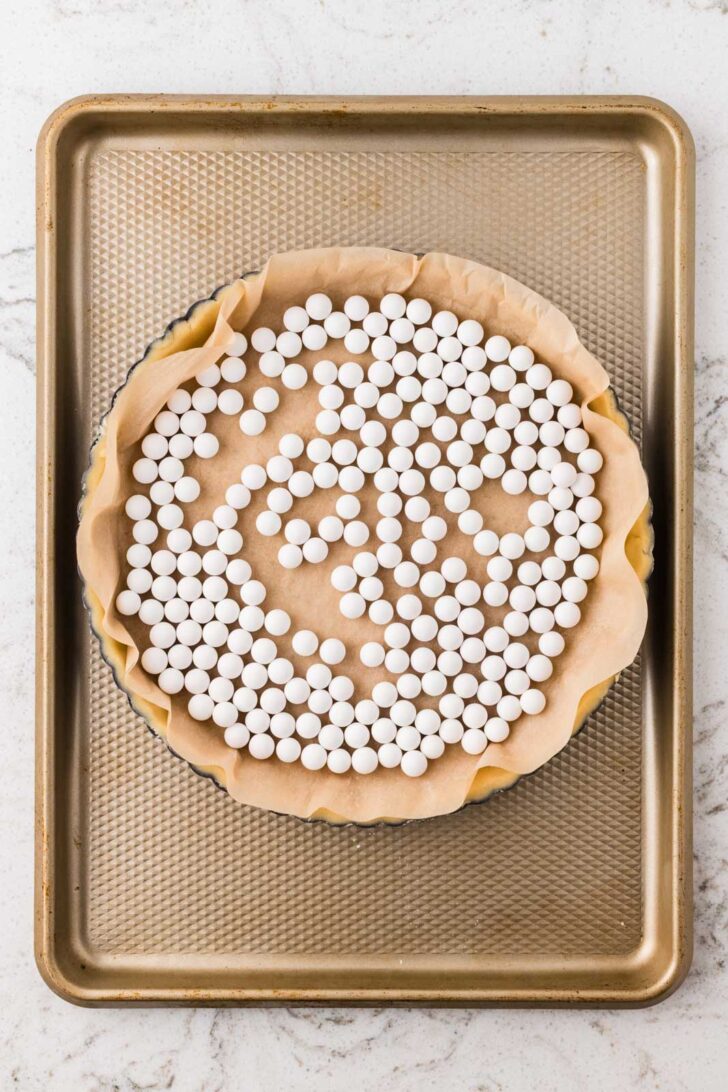
Step 3: Chill Again, Then Blind Bake
Prick the bottom of the crust all over with a fork and freeze it for 20 minutes while your oven preheats to 375°F. This second chill matters, as it lets the butter firm back up so your crust doesn’t shrink or slump in the oven.
Line the crust with parchment paper, fill it with pie weights (or one of the alternatives below), and bake for 15 minutes. Carefully lift out the parchment and weights, then bake the crust uncovered for another 9-11 minutes, until the bottom looks dry and the edges are lightly golden. Let it cool on the baking sheet for 10 minutes, then reduce your oven temperature to 325°F.
Step 4: Make the Lemon Filling
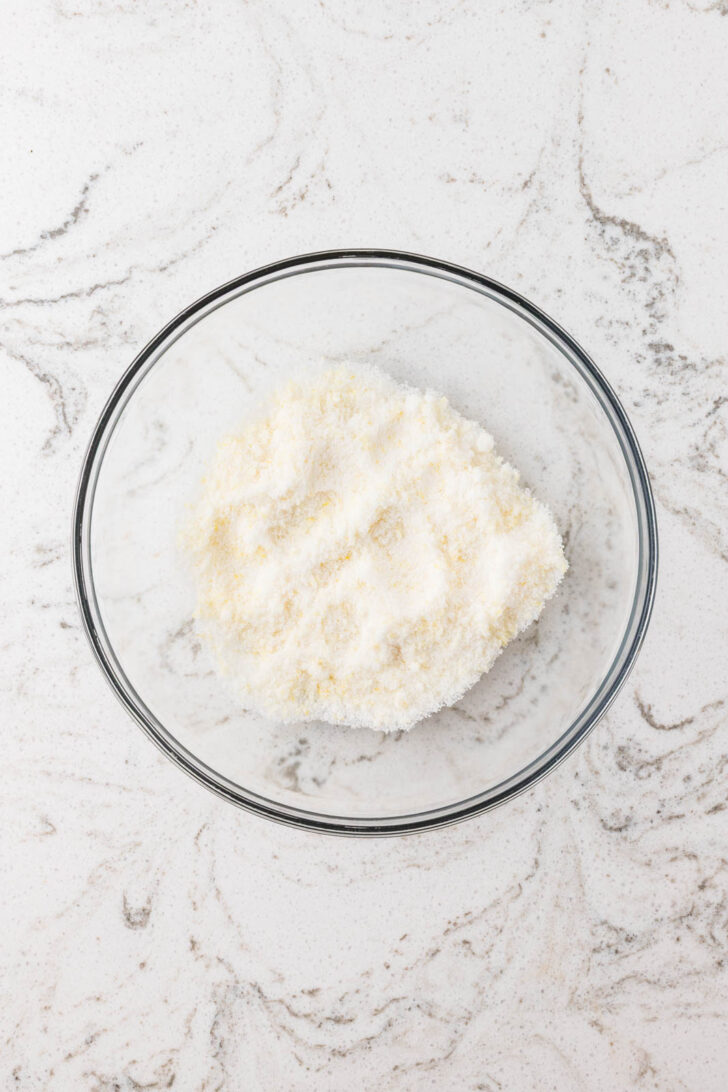
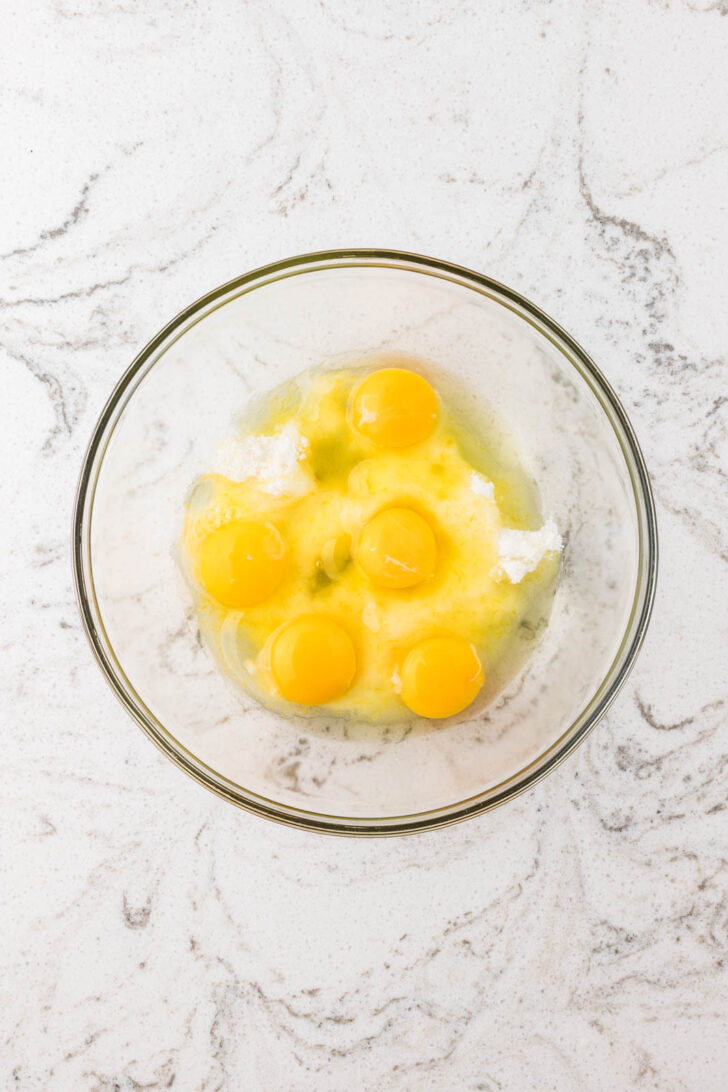
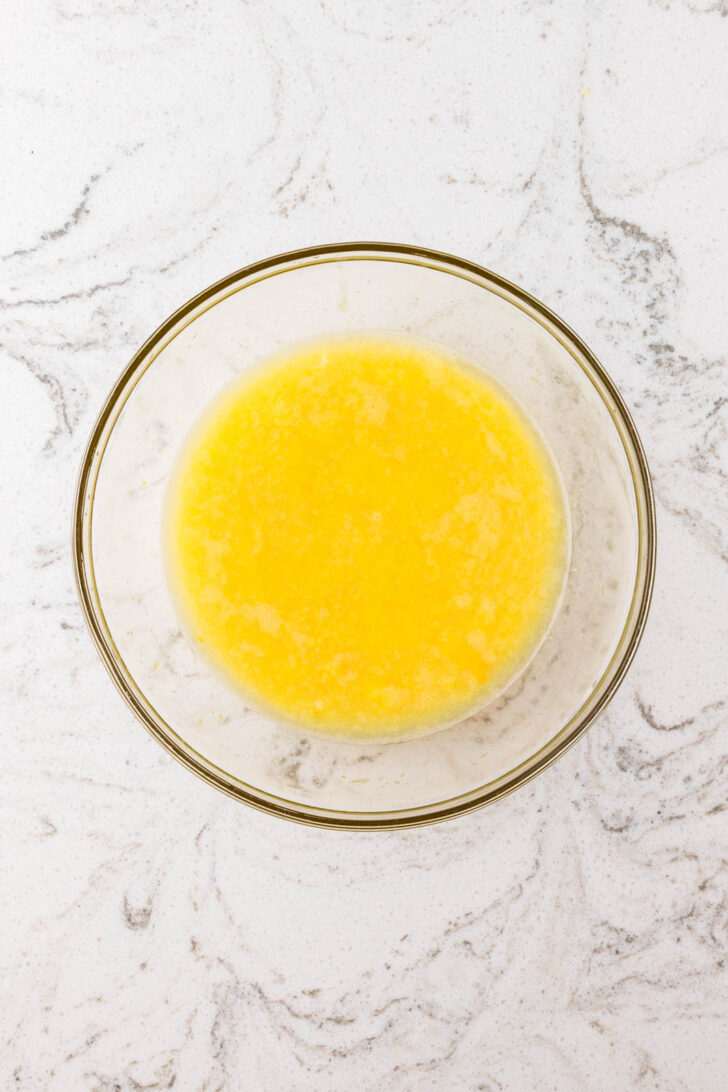
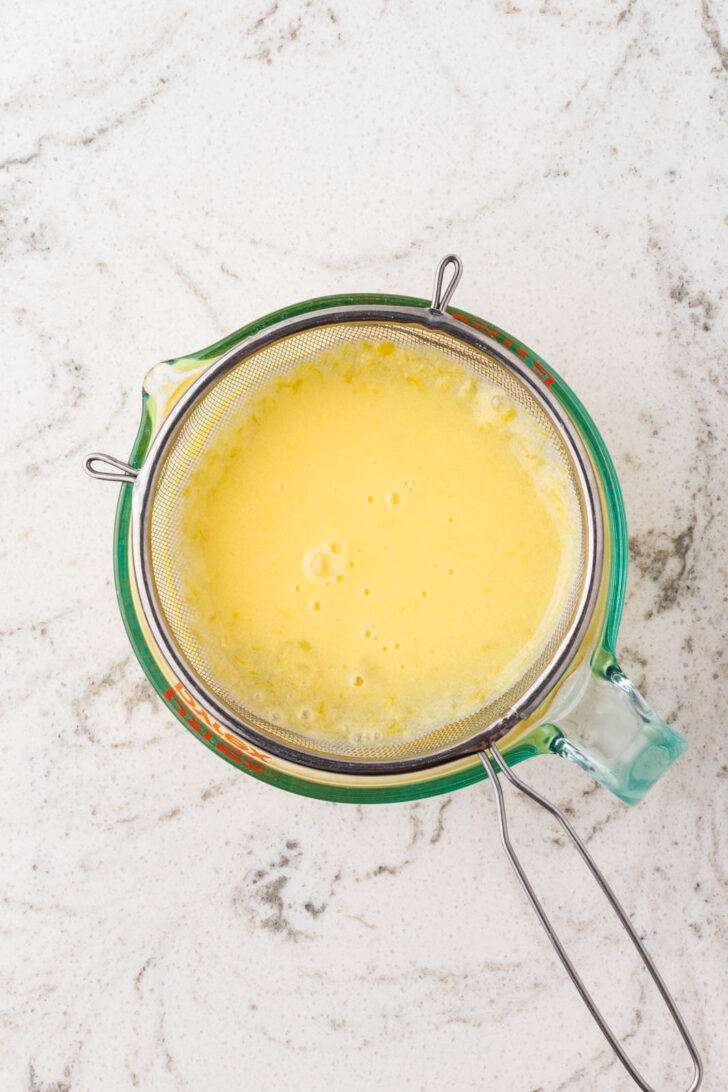
Rub the lemon zest into the granulated sugar with your fingers for about 30 seconds. This releases the fragrant lemon oils right into the sugar. Whisk in the eggs gently, then slowly whisk in the lemon juice, cream, and salt. Try not to whisk too vigorously here; extra air in the filling can create bubbles on the surface of your baked tart.
Pour the filling through a fine-mesh strainer (this catches any zest bits or egg membrane for a perfectly smooth texture) before pouring it into the still-warm crust, right on the oven rack to avoid spills. Stop pouring just below the top edge of the crust.
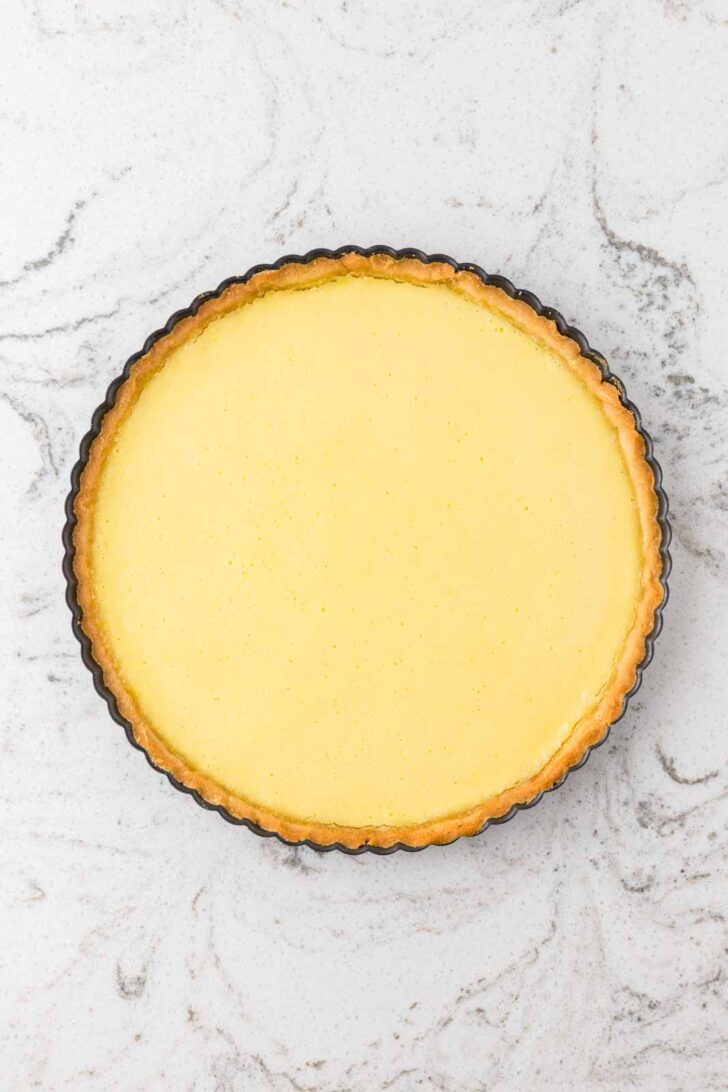
Step 5: Bake Low and Slow
Bake at 325°F for 24-30 minutes. You’re looking for the outer two inches of filling to look set, while the very center still has a gentle wobble when you nudge the pan. It should not look liquid or ripple like a wave. That’s actually a sign it needs a bit more time.
This step is the key to a perfect lemon tart. Pull it from the oven while it still jiggles slightly in the middle. The residual heat will continue to set the filling as it cools, and overbaking is the #1 cause of a cracked, grainy, or rubbery tart.
Step 6: Cool, Chill, and Garnish
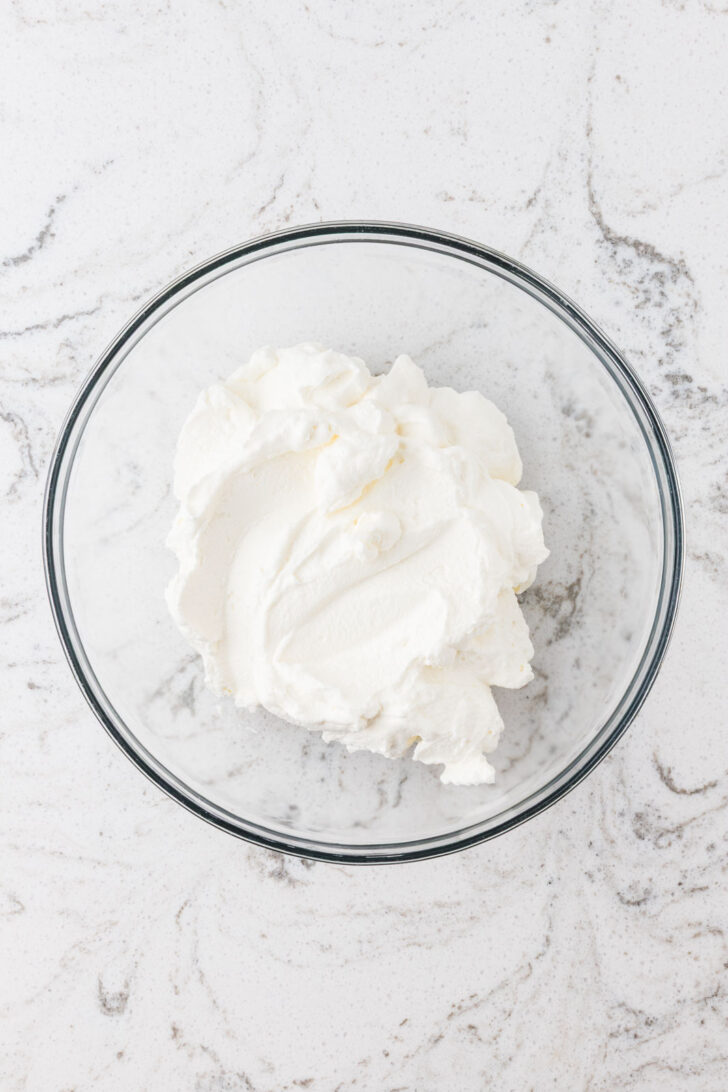


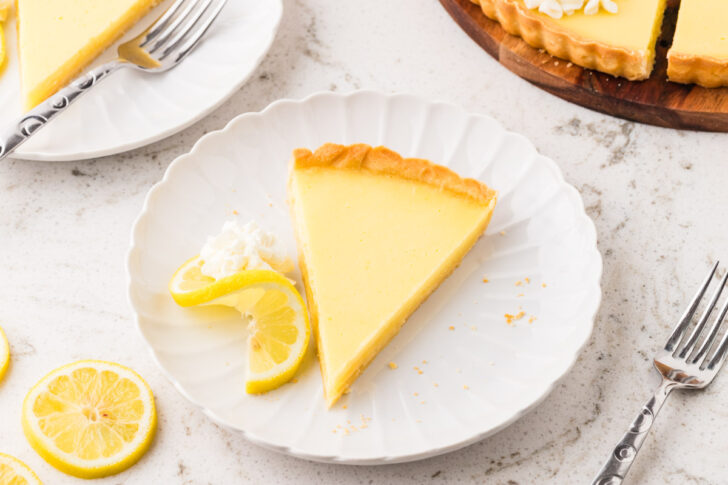
Let the tart cool completely in the pan on a wire rack, about an hour, then refrigerate it uncovered for at least 3 hours, until it’s completely chilled and firm. Whip the cold cream, powdered sugar, and vanilla to stiff peaks, then carefully unmold the tart and top it with the whipped cream and fresh lemon slices. Let it sit at room temperature for about 15 minutes before slicing with a sharp knife, wiping the blade clean between cuts for the prettiest slices.
No Pie Weights? Here’s What to Use Instead
Pie weights are great, but they’re not something every home baker has lying around. You absolutely don’t need to buy a bag of them just for one tart. Here are a few swaps that work just as well:
- Dried beans or rice. This is the most common substitute, and it works beautifully. Just keep this batch of beans or rice set aside specifically for blind baking. Once they’ve been in the oven this way, they’re not great for eating, but you can reuse them as weights again and again.
- Granulated sugar. Pour it directly over the parchment, right up to the edges. It conducts heat well and weighs the dough down evenly. Once it’s cooled, pour it back into your sugar container and use it for baking as normal.
- Another oven-safe pan or dish, nested right on top. If you have a second tart pan, cake pan, or oven-safe dish that fits inside the crust, set it directly on the dough (no parchment needed in this case) to weigh it down evenly.
- Ceramic mugs or ramekins. Arrange a few oven-safe mugs or ramekins across the bottom of the crust to add weight where you need it most, typically the base and where the bottom meets the sides.
- Heavy-duty foil, pressed in tightly. Skip the parchment-and-weights combo entirely and instead press a double layer of heavy-duty foil firmly into the bottom and up the sides of the crust, making sure it hugs every corner. It won’t weigh the dough down the same way, but it does a great job preventing puffing and shrinking. You may need to add a few extra minutes to the bake time.
Whatever you use, the goal is the same: keep the dough pressed flat against the pan so it doesn’t puff up or slide down the sides as it bakes.

Tips for Getting a Consistent, Perfect Lemon Tart Every Time
- Don’t skip straining the filling. It only takes a minute and it’s the difference between a glassy, smooth filling and one with little flecks of zest or egg white throughout.
- Use room-temperature eggs and cream. Cold ingredients straight from the fridge don’t blend as smoothly and can leave your filling slightly lumpy.
- Watch for the wobble, not the clock. Ovens vary, so use the visual cue (a gentle jiggle in the center, set edges) rather than relying only on the timer.
- Let it fully chill before slicing. I know it’s tempting to dig in right away, but the filling needs those few hours in the fridge to firm up completely. Cutting into it too early will give you a runny, unset slice.
- Wipe your knife between cuts. This is such a small thing, but it’s the difference between clean, bakery-style slices and a smeared mess.
Troubleshooting & FAQs
Why is my lemon tart filling runny or not set? This almost always means it needed more time in the oven, more time in the fridge, or both. The filling continues to firm up as it cools and chills, so give it the full 3+ hours in the refrigerator before slicing. If it’s still loose after that, it likely came out of the oven before the custard had fully set.
Why did my tart filling crack or turn grainy? This is the opposite problem from above; overbaking. Egg-based fillings like this one will keep cooking from residual heat after you pull them from the oven, so it’s better to take the tart out while the center still wobbles gently rather than waiting for it to look completely solid.
Why is there liquid pooling on top of my filling? This is called “weeping,” and it happens when the eggs in the filling are slightly overcooked, causing them to release moisture. Baking at a lower temperature (as this recipe does) and pulling the tart while the center still jiggles helps prevent it.
Why did my crust shrink or slide down the sides? This usually comes down to skipping a chill step or stretching the dough while pressing it into the pan. Make sure to chill the shaped crust before baking (this lets the butter firm back up), and press the dough into the pan gently rather than pulling or stretching it to fit.
My crust came out tough instead of tender. What happened? This is almost always from too much flour. Make sure you’re spooning flour into your measuring cup rather than scooping it from the bag, and resist the urge to add extra flour to the dough while rolling — flour your work surface instead.
Can I use bottled lemon juice instead of fresh? You can in a pinch, but I really don’t recommend it for this recipe. Since lemon is the entire flavor of this dessert, fresh juice makes a noticeable difference. Bottled juice can taste flat or slightly bitter by comparison.
Do I have to blind bake the crust? Yes. Blind baking (pre-baking the empty crust) is what keeps the bottom from turning soggy once the wet lemon filling is added. It’s a non-negotiable step for this recipe.
Can I use a regular pie pan instead of a tart pan? A tart pan with a removable bottom makes it much easier to unmold the tart cleanly for that classic look, but if a pie pan is all you have, you can use it, just know you’ll be serving slices straight from the pan rather than unmolding it.
Can I make this ahead of time? Yes! This is a great make-ahead dessert.
- The crust dough can be made up to 2 days ahead and stored tightly wrapped in the fridge. Let it sit at room temperature for about 10 minutes before rolling if it’s too firm.
- The fully baked tart can be made and refrigerated up to 1 day before serving. Just wait to add the whipped cream and lemon slices until shortly before you serve it.
Can I freeze lemon tart? I don’t recommend freezing this one. The egg-and-cream filling tends to turn watery or grainy once thawed, so it’s best enjoyed fresh within a few days.
How do I store leftover lemon tart? Store it loosely covered in the refrigerator for up to 4 days. Since the filling and whipped cream both contain eggs and dairy, don’t leave the tart out at room temperature for more than 2 hours.
When should I add the lemon slices on top? Add them shortly before serving. Fresh lemon slices release moisture as they sit, which can make your whipped cream look a little soggy if you garnish too far in advance.

More Lemon & Citrus Desserts Inspiration
If this lemon tart isn’t for you right now, here are a few more recipes from the blog that might be simpler:
- No-Bake Lemon Cheesecake: for when you want big lemon flavor without turning on the oven
- Limoncello Ricotta Cake: a luxurious, delicate cake with the same bright citrus notes
Browse the full Dessert recipe index for more sweet inspiration!

Hungry for more? Follow Suburban Simplicity on Facebook, Instagram, YouTube, and Pinterest to see more DIYs, recipes, and home tips!
Also, don’t forget to sign up for email!
I only send one email a week, and it’ll include my latest recipes, DIYs, and tips, information about exclusive “email only” giveaways, and more! See form below!
Want to subscribe to the Suburban Simplicity Recipe Club? It’s only $5 per month, and you’ll get ad-free PDFs of any new recipes that I post while supporting me at the same time! Join the club, here.

Lemon Tart
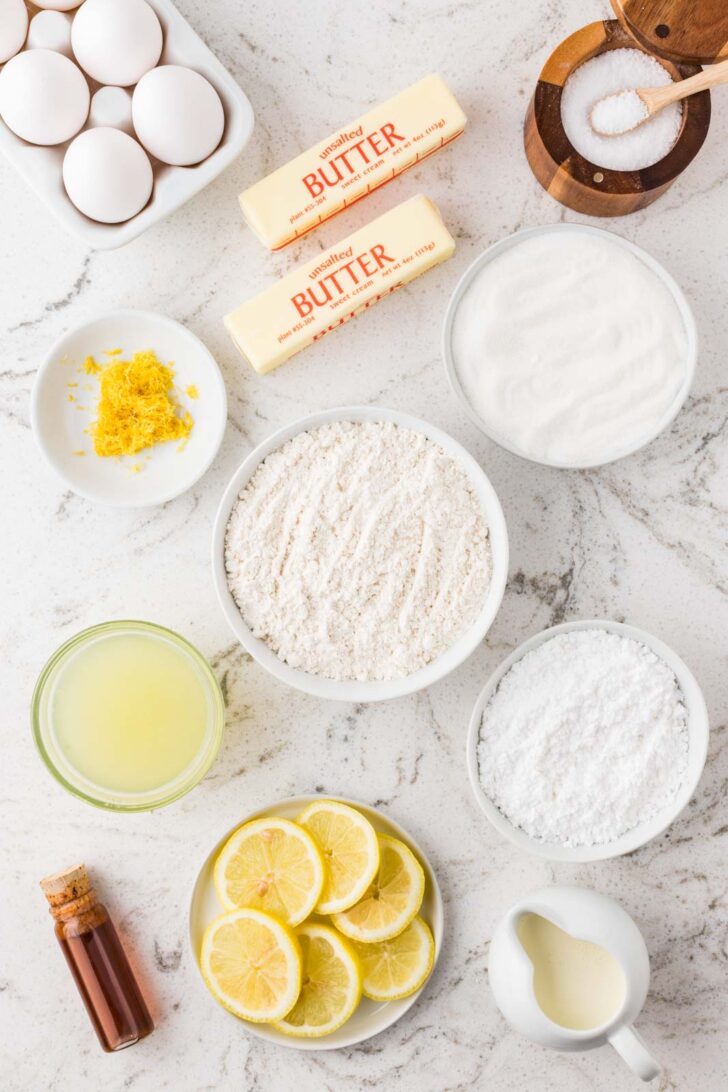
Ingredients
For the Pâte Sucrée Crust:
- 10 tablespoons unsalted butter, softened
- ⅔ cup powdered sugar
- 1 large egg yolk, room temperature
- 1 teaspoon pure vanilla extract
- 1 ¾ cups all-purpose flour
- ¼ teaspoon kosher salt
- 1-2 tablespoons cold heavy whipping cream
For the Lemon Filling:
- 1 cup granulated sugar
- 1 tablespoon finely grated lemon zest
- 5 large eggs, room temperature
- ¾ cup freshly squeezed lemon juice, strained
- ⅔ cup heavy whipping cream, room temperature
- ¼ teaspoon kosher salt
For the Whipped Cream and Garnish:
- ½ cup cold heavy whipping cream
- 2 tablespoons powdered sugar
- ½ teaspoon pure vanilla extract
- 1 lemon, thinly sliced
Equipment
- rolling pin
- mesh strainer
- sharp knife
Instructions
- Add 10 tablespoons softened unsalted butter and ⅔ cup powdered sugar to a large mixing bowl. Mix with a hand or stand mixer on low speed for 30 seconds, then increase to medium speed for about 2 minutes, until smooth and creamy. Add 1 egg yolk and 1 teaspoon pure vanilla extract, then mix on low speed until fully combined.
- Add 1¾ cups all-purpose flour and ¼ teaspoon kosher salt. Mix on low speed until the dough looks crumbly. Add 1 tablespoon cold heavy whipping cream and continue mixing just until the dough begins to come together. Add the remaining 1 tablespoon cold heavy whipping cream only if the dough is still too dry to hold together when gently pressed.
- Shape the dough into a flat disk, wrap it tightly in plastic wrap, and refrigerate it for 1 hour, or until firm but still easy to roll.
- Place the chilled dough on a lightly floured work surface and roll it into a 12-inch circle about ⅛-inch thick. Carefully transfer the dough to a 10-inch tart pan with a removable bottom. Gently press it across the bottom and up the flared sides without stretching it, then roll the rolling pin across the top of the pan to remove the excess dough.
- Prick the bottom of the crust several times with a fork and place the tart pan in the freezer for 20 minutes. While the crust chills, preheat the oven to 375°F.
- Place the chilled tart pan on a baking sheet. Line the crust with parchment paper and fill it with pie weights or dried beans, making sure the weights reach the edges. Bake at 375°F for 15 minutes.
- Carefully lift out the parchment paper and pie weights. Return the crust to the oven and bake for 9-11 minutes, until the bottom looks dry and the edges are lightly golden. Let the crust cool on the baking sheet for 10 minutes, then reduce the oven temperature to 325°F.
- Add 1 cup granulated sugar and 1 tablespoon finely grated lemon zest to a medium mixing bowl. Rub the zest into the sugar with your fingertips for about 30 seconds, until the sugar smells fragrant and feels slightly moist.
- Add 5 room-temperature eggs and whisk gently until smooth. Slowly whisk in ¾ cup of strained fresh lemon juice, ⅔ cup of room-temperature heavy whipping cream, and ¼ teaspoon of kosher salt. Avoid whisking vigorously, as excess air can create bubbles on the tart’s surface.
- Pour the lemon filling through a fine-mesh strainer into a bowl or large liquid measuring cup. Place the baking sheet with the tart shell on the center oven rack, then carefully pour the strained filling into the crust. Stop pouring if the filling reaches just below the top edge of the crust.
- Bake the tart at 325°F for 24-30 minutes, until the outer 2 inches of filling are set and the center still has a gentle wobble when the pan is moved. The center should not ripple or appear liquid.
- Allow the tart to cool completely in the pan on a wire rack for about 1 hour. Refrigerate it uncovered for at least 3 hours, or until the filling is completely chilled and firm.
- Add ½ cup of cold heavy whipping cream, 2 tablespoons of powdered sugar, and ½ teaspoon of pure vanilla extract to a clean mixing bowl. Beat on medium-high speed until stiff peaks form.
- Carefully remove the chilled tart from the pan and garnish it with the whipped cream and thin slices from 1 lemon. Let the tart sit at room temperature for 15 minutes before cutting. Cut it with a sharp knife, wiping the blade clean between slices. Serve and ENJOY!
Notes
- The pâte sucrée dough should feel soft and smooth once it comes together, but not sticky. Lightly flour the work surface instead of adding extra flour directly to the dough.
- Chilling the shaped tart shell before baking allows the butter to firm back up, which helps reduce shrinking and keeps the crust’s edges neat.
- Freshly squeezed lemon juice gives this tart the brightest, cleanest flavor. Bottled lemon juice can taste harsh or slightly bitter in a dessert where lemon is the main flavor.
- Remove the tart from the oven while the center still has a gentle wobble. The filling will continue setting as it cools, while overbaking can cause cracks or a grainy texture.
- Add the lemon slices shortly before serving because fresh slices may release moisture onto the whipped cream as they sit.